| • THE TEMPLE OF DOOM •
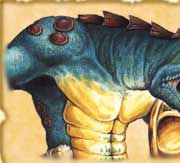
Choose a Random Warrior. This character will be the "Main Character" for this adventure. On the road, the "Main Character" shows the other Warriors a curious artefact consisting of a small, lidded vase with the figure of a Slann-Mage Priest crafted into it's design, which he found in the last adventure and pocketed while the other Warriors were searching elsewhere for treasure. Just when the others are about to question him as to why he didn't reveal this earlier, he says that the vase is filled with the ashes of a well known, ancient, Slann-Mage priest. He goes on to say that while at the last Settlement he set up a meeting with some Cathayans who were interested in the artefact which is too take place at a large Cathayan settlement that lies just ahead. Here he will swap the ashes for a precious diamond, supposedly worth 1000 gold. The people he is trading with are unknown, so he warns the others to be on guard. The other Warriors, eager for there share of the gold that the diamond will bring them soon forget this little hiccough about the Warrior not telling them beforehand and follow the Warrior towards their destination. Shan-Kia The Warriors reach the city of Shan-Kia by nightfall, just before the designated meeting. Entering the posh tavern Koki-Wan, and moving up the stairs to the second floor, it takes little time to spot the trading group. There are four of them, which are seated around one side of a large circular table. The obvious leader of the group, a beady eyed Cathayan, beckons the Warriors to sit down adjacent to them. As the Warriors sit, a song and dance stage act starts up at one end of this huge tavern, the singer being a dazzling blonde-haired female. A wooden turn table lies in the centre of the table where the Warriors are seated. The leader of the Cathayans produces a huge diamond from a waist pouch and places it on his end of the turn table. He then looks into the Main Character's eyes and says "Now, you give me Ku-Hachi." Placing the vase of ashes on the turn table the Main Character spins it and collects the diamond, allowing the Cathayans to take the ashes, which they quickly stash. Soon a bar-maid comes around serving all at the table a fine goblet, filled with wine. The weary travellers and the Cathayans drink to seal the exchange. Then the Cathayan leader says "Now, you give me the diamond." The Main Character replies with "Either your developing a sense of humour or I'm going deaf!" With that the four traders laugh boisterously, almost drowning out the stage act, and the leader takes out a small purple bottle. "What's that?" a Random Warrior asks. "An antidote." The Cathayan replies smugly. "To what?" another Warrior asks, already suspecting the answer. "To the poison you all just drank!" he states, again erupting into laughter. The Warriors feel they are already feeling the effects of the poison and weigh up the odds of jumping the Cathayans and taking the antidote by force. They decide it is too risky because the antidote may be destroyed in the fight, especially with them starting to feel light headed and their vision blurring. The Main Character, slamming the diamond down on the turntable, spins it again, awaiting the antidote. At this the Cathayans stand and chuckling, say "Oh I don't think so, no loose ends you know," thinking that they would be dead from the poison within seconds. But the Warriors are a lot tougher than expected, and a Random Warrior throws over the table, as the others lurch at the Cathayans, clutching for the antidote. Falling into a heap the antidote skittles across the floor, as does the diamond, as the rest of the taverns posh patrons are sent into a panic at the rough scene. One of the patrons knocks over a bucket of fake diamonds inconveniently being used in the performance, which spread out across the floor, engulfing the real diamond! Now Roll 2D6 for the light headed Warriors as they try desperately to get the antidote and / or the diamond. Keep rolling until told otherwise. 2 The struggle continues on and one Random Warrior almost grasps the antidote but a Cathayan runs up behind him and stabs him in the back for 3D6 Wounds. 3 One of the Cathayans grabs a nearby large skewer, stuffed with flaming meat which he hurls at a Random Warrior for 2D6 Wounds. 4 A Random Warrior has a stand up punch out with one of the Cathayans. Roll 1D6 and add Will Power, Strength, and Initiative. If the result is below 12 then the Cathayan has won and inflicts 1D6+4 Wounds. If the result 12 or above then the Warrior beats the Cathayan senseless. The next roll on this table has a +1 modifier. 5 The effects of the poison hits one of the Warriors extra hard, making his vision blur. He stumbles and falls into a group of the female dancers. The next roll on this table has a -1 modifier. 6 A Random Warrior makes a dazed punch at the leader of the Cathayans. Roll 1D6: On an odd number the Cathayan dodges the blow and delivers one of his own inflicting 1D6+3 Wounds. On an even number the Warrior manages to punch him square on the jaw knocking him over and (if it hasn't happened already!) sending the vase to the ground where is smashes, releasing the ashes of Ku-Hachi the Mage-Priest across the floor. The next roll on this table has a +1 modifier. 7 The lead singer of the dancing girls was watching the group closely and is now searching for the real diamond throughout all the other fake ones. Roll 1D6. On a 6 she finds it (if it hasn't been taken already) and stuffs is down the front of her dress. If she did find it roll 1D6 for each Warrior. On a 6 the Warrior sees the dancer take the diamond in a fleeting glance, throughout the action. 8 One of the Warriors is thrown down into the mass of fake diamonds. Roll 1D6. On a 6 he sees the real diamond (if it hasn't been taken already) throughout the fakes and takes it quickly. 9 A Random Warrior, thinking fast, grabs a serving tray and throws it with all his might at the Cathayans. Roll 1D3 to see how many of the Cathayan's heads it bounces off and hits, knocking them to the ground. This value is the number added to the next roll on this table. 10-12 Suddenly another group of Cathayans charge into the room holding crossbows. The Main Character sees a huge gong at the back of the room. He also sees the main female singer grab the antidote and put it down her dress. Grabbing her, he starts calling out to the other Warriors to head for the gong. Each Warrior is hit with 1D3 crossbow bolts before they can get behind the gong. Each bolt inflicts 1D6+2 Wounds. Once the Warriors are all behind the great gong the Main Character cuts the ropes attached to it and it falls to the floor where it begins to start rolling toward the window. Running behind it the Warriors and the dancer are protected from the crossbow bolts. It reaches the window and smashes it, but the window is too small for the gong fit though. Seeing they have little choice they jump through the window. Cart Scene Falling through a cloth veranda they fall onto the back of a cart with slates of building wood. At the carts helm is a young kid around twelve years old who is very surprised at this group of people that have dropped in! The Main Character shouts "Get moving!" and the very surprised Cathayan child, fearful of his new arrivals, agrees. He takes the cart at full speed to the outskirts of the town and beyond, escaping their pursuers. In the meantime the Main Character grabs the antidote from the singer, (Ignoring her statements of "I'm not that kind of girl!," and "I broke a nail!") Sharing the antidote between them the Warriors neutralise the poison, although it still leaves them feeling groggy and causes them to fall asleep. When they awaken it is late morning and they see two Cathayans directing the horses. Also they see they are on an edge of a huge cliff, and moving at a dangerous speed. The boy, in the back now, whispers to the Warriors that he was jumped and the cart has been hi-jacked! Hearing this the Warriors move to grab the hi-jackers from behind but they see it coming and turn sharply, directing the back of the cart to the edge of the cliff. The sudden movement also dislodges the top slate of building wood, sending it slipping off the cart. The boy, the singer and the Warriors are on the raft like slate, and hang on for dear life as it begins its merciless decent down the cliff's slope. Roll 1D6+1; this is how many rolls the Warriors must make on the following table before they reach the bottom of the cliff. Roll 2D6. 2 The wooden slate careers down the cliff at murderous speeds, bouncing off huge rocks and foliage. Suddenly a huge boulder appears in front of them and they are headed straight for it! Unable to jump clear in time, the group impacts on the boulder. The singer and kid are killed and the Warriors take 4D6 unmodified Wounds each. They must now head back to a Settlement, this adventure sadly ends now. Still, if one of the Warrior managed to pick up the diamond from their time spent at the Koki-Wan, they may sell it for 1000 Gold. If one of the Warriors saw the singer take the diamond, then they may take it off her crushed corpse. 3 The group hurtle downwards past trees and rocks. Soon they are hit by thick thorn bushes that cut into their skin. Each Warrior takes 2D6 unmodified Wounds. The singer and the kid take Wounds but survive. 4 Flying down the cliff at speeds not intended for men, the group come to a thickly wooded area. The branches of the trees are very low and a Random Warrior doesn't see one in time and is hit square in the face for 2D6 Wounds. The other Warriors manage to grab him before is knocked from the slate. 5 As the group traverse the cliff at breakneck speeds they see a large leopard up ahead. As they pass him, he makes a swing for a Random Warrior with his mighty claws. The leopard hits on a 4+. If the leopard does hit then it inflicts 1D6+5 Wounds. 6 The group speed though some light foliage, which whips across their bodies, inflicting 1D6+2 Wounds. 7 As they hurtle down the slope they pass under many trees. Throughout some of the trees are moneys who can't resist using the moving target below as target practice. Each Warrior is hit with 1D3 rocks, each inflicting 1D6 Wounds. 8 The group pass though a boggy area of the cliff that releases toxic fumes as they pass over it. Each Warrior must roll under their base Toughness on 1D6 or are effected but the fumes for 1D3 unmodified Wounds, which is fatal damage. The singer and the kid cough and splutter but they are relatively fine. 9-12 The group moves down the cliff at amazing speed, going pass large rocks and trees. Introductions Finally they reach the bottom and slip into a calm moving stream, which takes them gently along as they recover. The Singer introduces herself as Skilly Wott, and the boy says he is Small Rounder. If any of the Warriors saw Skilly take the diamond at the tavern they may take it off her now; it is theirs after all! Before long they drift to the bank of the river and Small Rounder asks where they are. The Main Character looks up and sees an old Pygmy watching them from the bank, and says "Pygmy country." Pygmy Country They soon find the Pygmy be part of one of the few friendly tribes that inhabit Lustria's jungle regions. He takes them to his village which seems to be in much turmoil. The old Pygmy explains to the other Warriors that the evil Pygmies that live in a deserted Slann temple to the north are dabbling in dark arts and worshipping an ancient evil god. They go on to tell them that they came to their village and stole their children from them. They also tell the Warriors of a magical rock, called a Cankara stone, that was also stolen from the village. It is one in a set of five and the evil Pygmies are searching for the others. They will have great power if they were to succeed, even power that will rival the Slann Mage-Priests themselves. They implore the Warriors to help them and return their children and their Cankara stone. If the Warriors decide to help the Pygmies read on. Otherwise they must return to a settlement as usual, much to the relief of Skilly Wott. If one of the Warriors has the diamond, they may sell it for 1000 Gold at the nearest Settlement. The Trip The trip to the evil temple takes 1D3 rolls on the Lost Kingdoms Hazard Table. The boy comes with them willingly, for what he calls "fortune and glory," and Skilly decides she must stay with the Warriors for protection, although she complains a lot. At anytime (in between events) any Warrior may challenge Small Rounder to a game of cards. The Warrior can bet up to 200 gold, and Small Rounder will match his bet. Then the Warrior rolls 1D6 and Small Rounder roll 1D6. The highest number wins, re-roll doubles. Jan-Kok Temple Once the rolls are completed they finally reach Jan-Kok Temple. It looms above them like a shadow that can not be shunned by the sun. As they approach, they notice that a regiment of Bretonnians are also present! Their presence make the Warriors unsure of the tales told earlier by the Pygmies, until one of the Warriors recognises one of the guards. He tells the others that he knows the Bretonnian to be a good man whom he met once in Brionne, so they make their way towards the Temple's entrance, ready for the worst. But instead of being attacked they are greeted by one of the Pygmies by a hand shake. He tells them to come inside and spend the night, for they must be weary from their travels. Because the Bretonnian forces are so close and because they need a closer look, they decide to play along. The Feast Soon begins a great feast. Seated on cushions they gaze upon one of the longest tables they have ever seen! Up and down it sit many Pygmies, the Warriors, Skilly, and Rounder, as well as some of the Bretonnians, including the man known to the Warrior. At the table's head sits a younger Pygmy who apparently is their current Prince. Before long the food begins, and every dish seems more disgusting than the next. The Warriors must put up with the food so they can keep their cover. For each Warrior roll 1D6. This is the amount of times he must roll on this chart, which represents which dishes he is served and must partake of. For each result add the number under the Number column up.
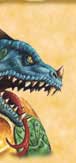
The end result for each Warrior is to see how much of this disgusting stuff he can endure, (Skilly passes out at a serving of chilled monkey brains). Each Warrior must roll 2D6 and add their Will Power. If the result is higher than the total of all the foods he had to eat, then he has stomached the food. If the result is lower then the disgusting foods prove too much for the Warrior and he runs over to the corner of the room clutching at his mouth as he vomits up the vile sustenance. Also the Pygmies find it very strange that the Warrior would do this and watch him like a hawk; For the remainder of the adventure he has -1 Luck. When the festivities are over the Warriors adjourn to their room. A Random Warrior stays on guard while the others sleep. Soon he is attacked by five Pygmies! Fight a battle using a room board section as the bed room. Roll 1D6 for how many turns it takes for the other Warriors to wake up and help. Once the battle is over work out treasure a normal. The Warriors then see a secret passage in the wall where the assassins came from. Curious of what lies before them they enter. Shuffle 6 Dungeon Cards, and add an extra final card, being the being the Firechasm Objective Room. When all the Warriors reach the end, read the section entitled "Ceremonial Chamber". Play this dungeon layout as any other, although if there are any T-junctions, Intersections or the Hall of Death draw another card to replace it. Skilly and Small Rounder take to the shadows and need not be placed on the board; it is assumed that they are in the same board section as the leader. If there are any rooms entered, roll 1D6 once all the Warriors have finished moving. If any room has a Crushing Ceiling Trap or Bugs, then there is nothing else in the room. Do not draw an Event Card also. 1-2 Crushing Ceiling Trap Suddenly Stone slabs roll in front of the door ways and the ceiling begins to slowly move down onto the Warriors! The ceiling also has sharp spikes attached. Any Warrior standing outside the room (adjacent to the doorway) may make an Initiative Test (roll 1D6 and add Initiative) of 7 or more to deactivate the trap and return it to it's dormant state. If there are not any Warriors outside the room then they must try to find a secret lever within the trapped room itself. An Initiative roll of 8 will succeed in finding the lever. Roll 2D6 to see how many turns they have to find a lever before they are crushed to death. Every Warrior may make 1 attempt at this per turn. 3-4 Bugs This whole area is infested with bugs! Any model (apart from Undead) are effected and suffer a -1 penalty to all to hit rolls. 5-6 Nothing - Play as normal room. Ceremonial Chamber The group moves onto a balcony like area, overseeing a huge ceremonial chamber bathed in a red glow emanating from torch light, and a chasm filled with lava. In the centre of the room stands a priest with his army of devoted followers. The priest is babbling about the resurrection of Bali-Mar, an ancient evil god, which whips them into a chanting frenzy. The Warriors look on as the Pygmy priest, calling himself Yoler-Ram, tears the still beating heart from a screaming sacrifice. Their eyes widen as they see that the man still lives and his separated hart still beats! He is then attached to human sized cage and lowered into the lava filled chasm to his death. Just when the Warriors are pondering their chances against the followers they spot a huge sculptured skull behind the priest that holds thee of the Cankara stones, including the one for the village of Pygmies that the Warriors are trying to find! They glow with a magical power. A few moments pass and the priest leaves after his ritual, and this prompts the followers to leave also through a network of tunnels. Deciding to seize their chance the Warriors edge down the rocky side of the chamber, leaving Skilly and Small Rounder on the balcony. Before long they make it down to the chamber, and the Main Character manages to grab the stones. Suddenly they are ambushed buy Bali-Mar followers determined to protect their stones. Fight a battle on the Firechasm Board Section. Any model adjacent to the lava chasm rolling a 1 to hit must roll another 1D6. On a 1 they fall into the chasm, and are melted to death. Before the battle begins, place the Warriors on random squares, on the far side of the board section, because they were surprised. Then place the 1D6 Pygmies, per Warrior, as normal. Treasure is as normal, except for the gaining of an Objective Room Treasure Card, of which there is none. Do not roll for Objective Room Monsters. The only combatants the Warriors must fight are the 1D6 Pygmies each. Once the battle is won they decide they can't go back without the lost children. Bringing down Skilly and Rounder, they venture off into the catacomb tunnels in a hope to find them. The Prison Mines Make a dungeon deck as normal with only 8 Dungeon Cards and an Objective Room shuffled within the last 4 cards, using the Idol Chamber. Play the dungeon as normal, but when entering a room roll 1D6 on the next chart as well as the normal rule for the room. Record the amount of children rescued. Keep track of many children are rescued. 1 The Warriors find a child's bones next to a pick and shackles. 2 The Warriors find no children here. 3 Here the Warriors see one young boy mining at the wall. Once the room's events have been completed they rescue him and he runs off to freedom. 4 Here the Warriors see two young children mining at the wall. Once the room's events have been completed they rescue them and they runs off to freedom. 5 Here the Warriors see three young children mining at the wall. Once the room's events have been completed they rescue them and they runs off to freedom. 6 Here the Warriors see four young children mining at the wall. Once the room's events have been completed they rescue them and they runs off to freedom. Once the Objective Room is reached place a miniature to represent the Pygmy Boy Prince at the back of the room. He is holding a voodoo doll for each Warrior. The two columns of squares running from the doorway to the idol are actually a conveyer belt moving towards a large rolling cylinder of stone made for crushing rocks. At the end of the turn any model on the belt is moved one square towards the grind stone. Any model actually pulled into and under the grind stone is killed. Monsters one square away from the grind stone will try and move away from it into an adjacent square, if they are pinned by a Warrior they can't move, alas. The Prince has the attributes of a Pygmy Witchdoctor, and at the start of the Monster's Phase he grabs a Random Warriors voodoo doll and stabs it with his dagger. The effect of this is gained by rolling 1D6 on the Pygmy Witchdoctor's Voodoo special rule table, which can be found under the Pygmy Monster section. Roll for Objective Room Monsters as usual. Collect Objective Room treasure as usual as well. Although Skilly hides in the shadows, Rounder sees the threat of the Prince and his voodoo doll and tries to make it there to stop him. At the end of each turn roll 1D6 for Rounder (remember don't place Skilly or Rounder on the board) 1-3 He doesn't manage to get to the prince. 4-5 Ducking and weaving through the battling combatants Rounder gets closer to his target. Add +1 to any future rolls on this table (cumulative). 6 (Don't roll on this table again) Reaching the Prince, Rounder jumps on him and tries to over power him. Roll 1D6 and add 2 (Rounder's Strength). Now roll 1D6 and add the Prince's Strength of 2. If Rounder's total is higher he over powers the prince and knocks him out with a flurry of punches. If the Princes total is higher he throws Rounder of and Rounder must try to over power him again next turn! The Prince continues to stab the voodoo doll as normal this turn. If the results are the same, roll again. Obviously, if the Boy Prince is killed by the other Warriors, Rounder returns to the shadows and does nothing more to help this combat. Once the room has been completed the Warriors find a group of 3D6 children mining in a cave behind them. They set them free and they run to safety. The Warriors are about to follow them but are cut off by a mass of Pygmies with blow pipes. They are forced to retreat back into the Idol Chamber. Looking around desperately, the Warriors see a mine cart sitting on some tracks leading of into the darkness. They immediately leap into it and push off down into the darkness. Even as they move off, they see 1D3 Pygmies leap into a mine cart of their own and pursue them. The Mine Cart Chase To symbolise the tracks shuffle up a normal dungeon deck. Before you shuffle make sure there are at least 6 non room board sections. Place a passage way down to begin and place the Warrior's mine cart (2x2 squares) at the front of the tracks, and place the Pygmies mine cart at the back of the tracks. There is no need to roll the Power dice during this chase scene. Every turn the Warriors roll 1D6 to see how far they travel, and then the Pygmies do also. When the Pygmies are within 4 squares of the Warriors they use their blow darts (roll to hit as usual, with a -1 modifier). The Warriors are two busy holding on and adjusting their balance to strike back. A Room card represents a break in the tracks over a chasm; draw the next card also (if it is another room, discard it and replace it with another card. Keep doing this until the card is another passageway). Each Warrior must roll 1D6. If all the results are the same number then they have fallen down the chasm to their deaths. (If only one person left, on a 1 then) Otherwise they jump the tracks and land safely on the next ones. The chasm does not take any movement. The Pygmies must also roll. Once the 6th board section has been cleared by the Warriors, the Head Priest opens up the flood gates of a massive water supply within the mountain filling the tunnels with merciless water. Roll 2D6 at the end of each turn to see how far the water has reached (begin at the start). Use a counter to represent the position of the water. If the water covers or surpasses the Warriors they are cruelly thrown against the walls of the mines and eventually spewed out of the mountain to fall to their deaths. When the Objective Room is reached, the end of the tracks are reached and the Warriors leap from the mine cart and to a nearby exit. Unfortunately the exit is in the side of a cliff and the Warriors are forced to cling around the edge of it as water spews out of the exit with murderous force. The Main Character is separated from the others and must climb up a different route in order to reunite him with his adventuring companions. The other Warriors and company climb easily up to a large rope bridge spanning a great chasm. At the bottom of the chasm is a river filled with crocodiles. They begin to move across it and reach the end but are surprised by a group of Pygmies and their leader Yoler-Ram. Before they have a chance to react Yoler-Ram blows a strange powder at them, which assails their nostrils and causes them to become dizzy and docile for a few moments. By this time the Main Character has run onto the bridge and made it half way across when he looks up and sees the rest of the group captured at the other end. Glancing back he also sees pygmies moving up behind him. They come from both sides and start closing in! The Main Character tries to bargain his way out of it by holding the bag of Cankara stones over the edge. But Yoler-Ram only responds to this by yelling "Drop them, Mr <Warrior's Name>, they will be found! You won't!" He then bursts out into fits of laughter. Deciding on another course of action, the Warrior decides to cut through the bridge and hang on tight. Every one is now on the bridge and the Main Character calls out to the group to hang on. Then he brings his mighty weapon down on the bridge's structure. The Warrior has 1D6 turns to cut through the bridge. Each turn roll 1D6 and add the Warrior's Strength. If the total is over 8, or a natural 6 is rolled, then he has cut through the bridge. Once the Warriors turns have run out then the Pygmies have reached him and they (there will be two of them) make an attack against him. Work out the two hits and Wounds as usual. They will attack him each subsequent turn, after he has tried to cut the bridge. The Warrior may not retaliate against these attacks. If the Warrior dies, then the other Warriors must fight a battle with 5D6 Pygmies with one Pygmy Shaman (Yoler-Ram) , on five corridor board sections to represent the bridge. If the Warriors win then go directly to the section entitled "Adventure Completed". Cutting the Bridge Once the bridge is cut the two halves swing down and slam into the cliff sides. Roll 2D6 for each Warrior. On a double 1 they fail to hang onto the bridge and fall to their deaths, food for hungry crocodiles. Place 3 board sections down to represent the bridge hanging against the cliff. Now place the Warriors, Small Rounder and Skilly (place them on the board this time!) randomly on the first two board sections, apart from the Main Character. The Main Character must be placed on a random square on the last board section. Each board section also has 1D3 Pygmy guards on it, which are also placed randomly. Now choose a random board section and a random square for the Yoler-Ram. The Warriors must make it to the top of the bridge, and can only move 1D3 squares a turn due to having to climb up the bridge. When beginning to move every model must roll 3D6, if they all come up with the same number the subject has lost his grip and falls to his death. Pygmies need only roll 2D6 to see if they fall off. The Warriors, Skilly, Rounder and Yoler-Ram can roll 3D6. When pinned by a Pygmy guard at the end of the turn, roll 1D6 on the following table. 1-2 The Pygmy kicks the Warrior roughly. He must make a bridge moving roll immediately. 3-4 The Warrior punches the Pygmy square on the jaw, he must make a bridge moving roll immediately. 5-6 Giving the Pygmy a hard kick, he goes flying of the bridge speeding to his death below. When pinned by Yoler-Ram at the end of the turn, roll on the following table. 1 The Priest punches the Warrior, dazing him for a second and begins his dark ritual. He moves to tear the Warrior heat out! The Warrior must roll under his Toughness on 1D6 (1 always fail), otherwise his heart is torn out of his chest and he falls to his death. 2-3 The Priest kicks the Warrior harshly, causing him to make a bridge moving roll immediately. 4-5 The Warrior punches the Priest square on the jaw, he must make a bridge moving roll immediately. 6 Punching Yoler-Ram repeatedly in the face, he looses his grip on the bridge and falls to the waiting crocodiles below. After 1D6 turns 1D6 Pygmies with blow pipes begin firing at any Warriors left on the bridge from the opposed cliff. Roll to hit and Wounds as normal. Yoler-Ram will head toward the Main Character always, because he wants the stones. The other guards will move towards the top until pinned where a roll on the appropriate table is required. Once the Warriors reach the top they find that the Bretonnian forces are up there, laying waste to the armies of Pygmies that were about to attack the Warriors. They quickly dispatch the remaining Pygmies and leave the Warriors to return to the village. Adventure Completed The Warriors are welcomed back to the Pygmy village as heroes after bringing back their children and their stone. The old Pygmy Shaman of the village explains that they only need one stone, and says he may be able to convert the other stone's power into an item. The remaining two stones can be burnt into a weapon if the Warriors wish. For each stone used on a weapon roll on the chart below. Only one stone may be burnt onto a weapon. 1-2 The stone's power is wasted. 3-4 The stone's power surges into the item giving it's user +1 Toughness. 5 The stone's power surges into the item giving it's user +1 Strength. 6 The stone's power surges into the item giving it's user +1 Weapon Skill. The Pygmies also give the Warrior 1 provision per rescued child each before they depart for the next Settlement. Oh yeah, and if the Warriors still have the diamond, don't forget to sell it for 1000 Gold.
The Temple of Doom by Ben Head. |