

|
•
DUKARL AND THE RISE
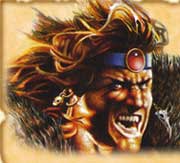
Dukarl and the Rise of Vermillion is a two part campaign. The first part of the campaign is The Rescue. PART 1 - THE RESCUE The Warriors are called to the Royal Palace of Altdorf, on a matter of dire importance. The Black Knight, Dukarl has resurfaced after many years of hiding. His great crimes against the empire alone are reason enough to bring him to justice, but from our now dead spies within his organisation, we have learnt that Dukarl has devised his most deadly plot yet. Joining forces with a Dragon Ogre named Hut-Bull, Dukarl has kidnapped the old wizard Jaymin. Before he was taken, Jaymin had just deciphered a set of old runes that supposedly told of how to resurrect an ancient dark god of some kind. Obviously Jaymin's knowledge has made him very dangerous. The Warriors quest is to journey to Dukarl's secret dungeon at the northern end of the Grey Mountains and rescue Jaymin at all costs. SPECIAL RULES Play this adventure as normal until the Objective Room is reached. When the Warriors enter the Objective Room roll for Monsters as normal. In addition, the Black Knight Dukarl is placed at the rear of the room. His statistics are below. Jaymin is nowhere to be seen at this time.
Dukarl
Victory! Once the Monsters are dead and Dukarl is defeated the Warriors search the corpse ridden battlefield for Jaymin, but he is nowhere to be found. Dukarl is not dead! He pulls his bleeding body up to slump against the wall. "You won't find him...," he coughs through blood stained teeth. "Hut-Bull took him.., he betrayed me, all I wanted was to put a healthy ransom on that wizard's head to rebuild my forces and... so on." ' One of the Warriors steps up to Dukarl and threatens to finish him unless he tells them the destination of Hut-Bull and his captive Jaymin. A wry smile spreads across the Black Knights face hidden by his full helm, "If I was to tell you, then there would be no reason for you not to kill me now would there. Oh yes... I know his destination, but I think it best if I....(cough)... take you to it myself. I know what you must be thinking....you can't trust me. Well no....you can't, but I want my revenge on Hut-Bull and you can't save your damn wizard without my help." With that he pulls himself more up right (obviously his magical armour is working its healing). "So what do you say? You have my word as a knight I will not attack you during this time." The Warriors at this point can either kill Dukarl or leave him behind and end the campaign now, or they can take him up on his offer. If they agree to let him lead them to Hut-Bull's lair then read on. The leader of the Warriors reluctantly shakes the Black Knight's hand. Dukarl then states strongly, "A truce then,... at least until we get to Norsca." At this the Warriors eyes widen. "Oh, didn't I say?," the knight continues. "That is where we're headed." PART 2- COLD BLOODED The second part of the campaign is Cold Blooded and although it starts here, the next adventure does not actually start until the Warriors set sail for Norsca. Therefore any items or special abilities lasting until the end of the adventure are still in effect. The Warriors and the Black Knight must now make their way to a Seaport in order to seek passage to Norsca. Dukarl tells the Warriors of a Seaport where he is known and respected among the cutthroats so that they can find a ship more quickly. Controlling Dukarl Pick one of the Warriors to control Dukarl. Use him as you would any other Warrior, using his statistics and items. Use a counter for him when determining random Warrior events and so on. By the time the Warriors exit the dungeon he is healed back to half Wounds (25). If Dukarl is killed before reaching the destination of Hut-Bull then the campaign must be aborted. He has 5 provisions and 5 bandages which he will only use on himself when he has been wounded. In combat he fights with the Warriors according to Initiative, but never goes first. Record Gold for him, which starts on 245. Dukarl also receives Treasure in the same fashion as the Warriors. Dukarl will never trade equipment or give away his gold, but he will sell equipment to the other Warriors although he charges them double the Gold value. At the Seaport When the Seaport is reached, Dukarl, escorted by the Warriors arranges a boat to Norsca. He manages to get a ship that sails in four days (make the necessary rolls for Captain, cost and so on). For the rest of the four days he follows one of the Warriors around. Determine whether the events happen to him or the Warrior when they are rolled. At any shops visited Dukarl can also buy items (for example, if he is low in provisions he will buy some provisions). The leader of the Warriors sends off a carrier pigeon to inform Altdorf of the proceedings. At Sea Treat the voyage as normal and don't forget Dislike Points for Dukarl. If the Black Knight becomes separated at sea (eg thrown overboard) then the quest must be aborted. At the Norse Seaport Treat this as normal following the rules used above for Dukarl. The Journey to Hut-Bulls Lair Once the Warriors have left the Norse Seaport they must journey to Hut-Bulls lair. Since it is so far away it will take them 2D6 weeks to get there. Once they are there read the following. The Entrance The dungeon of Hut-Bull is cut deep in the side of a huge icy cliff. It is now that the Warriors realise they no longer need Dukarl, but to turn on him now would be unwise for he is fully rested and would certainly weaken the Warriors before they enter Hut-Bulls lair. They know they will need all their strength if they are to succeed. At this point the Warriors can either turn on Dukarl and attack him, resulting in a battle after which they can enter the dungeon, or they can enter the dungeon with the Black Knight on their side, only they are not sure for how long, remembering that the truce was only to Norsca! The Dungeon of Hut-Bull Play this adventure as a normal Norse adventure, using any large Objective Room. When reaching the Objective room place the Dragon Ogre Hut-Bull at the back adjacent to Jaymin, who himself is adjacent to a large cauldron that takes up 4 squares. Then roll for Objective Room Monsters as normal. The Warriors can see that Hut-Bull is shouting at Jaymin to work faster, as the old wizard throws various substances and body parts into the pot. The poor fool is obviously under Hut-Bulls control somehow. The Warriors have 1D6 turns to defeat Hut-Bull and break the spell before the shadowy essence of the ancient Dark God "Vermillion" rises from the cauldron!
Hut-Bull Fear 8; Magic Armour; Magic Item; Magic Weapon. The Essence of Vermillion If the Warriors do not kill Hut-Bull in the specified time then Vermillion begins to rise. Of course, Vermillion has only just begun to form, but even so is still deadly. He can't move away from the cauldron for only his upper torso has appeared. Any Warrior standing adjacent to the pot at the start of the Monsters Phase is clawed at by Vermillions ethereal claws, resulting in the loss of 1D6+4 unmodified Wounds. When Hut-Bull is killed then the hold he has over Jaymin fades and Jaymin collapses and stops working. This results in the ritual being interrupted and the Essence of Vermillion fades away into nothingness as he yells in defeat. Jaymin If any Warrior tries to touch Jaymin to pull him away from the area they are thrown back by some magical force. When Hut-Bull is killed the hold over Jaymin is broken, but the strain is too much of him and he dies. Since the knowledge he possesses, even when dead, is incredibly vast, they must carry his body back to Altdorf to be cremated to prove that it will never come into the wrong hands. One Warrior must carry Jaymin back and be at -1 Movement while doing so. If a combat occurs, the Warrior dumps Jaymin's body in a corner and picks him up again afterwards. If the Black Knight is Still Alive Dukarl leans on a near by wall and casually states "Well, you are all great heroes, and I guess you are wondering how I knew how to get here so precisely. Well the truth is that this used to be my dungeon, and you were fools to trust me beyond my word!" With this he slips through a secret door in the wall he was leaning on and the Warriors hear the familiar sound of a heavy lever being moved. Large stone slabs come down in front of the doors making them impassable. Soon after, ice cold water comes flooding into the room from many chutes around the walls. Realising they must act fast the Warriors try to escape! If the Warriors have no other means of escape then roll on the following table once each turn. While trapped, no Unexpected Events will happen in this room. If the Warriors haven't escaped after 4 turns they have failed to escape and drowning in the icy cold water. 1-2 The Warriors search frantically for a way out but come up with naught. 3-4 The Warriors manage to block one of the chutes. Roll again immediately. 5 The Warriors notice a secret hatch in the wall which they hit repeatedly trying to smash it open. Add +1 to all remaining rolls on this table. 6 Working hard the Warriors are able to break open a small hatch in the wall and scramble through it before the water drowns them. They break through into a stairway which leads to the surface. They have escaped! Victory! When the Monsters are all defeated and the essence of Vermillion destroyed then the quest is over. When the Warriors get back to the Old World they can collect payment from Altdorf of a sum of 500 Gold each if they still have the body of Jaymin as proof. Otherwise they receive nothing!
Dukarl and the Rise of Vermillion by Ben Head. |